

In this free Maya tutorial you will learn how to create a realistic bed using Maya and Marvelous Designer, an external software which is great in cloth simulations and fashion design. Download Marvelous Design now to learn clothing techniques with its 30 days free trial version. Are you ready to learn amazing techniques combining this two great softwares?
TYPE: Free Maya tutorial, Marvelous designer tutorial
CATEGORY: Modeling, Cloth simulation
INTRO
If you take a look at serious 3d graphic forums you can see a lot of amazing bed room, with ultra realistic surface and natural look. If you have ever tried Maya nCloth you know the awful truth: make a decent bed in maya is almost impossible. Did you have ever thought "How they f+++in modeled these awesome pillows and blanket?" If you have ever said this then probably you have never used Marvelous Designer. What is this? Marvelous designer is a special fashion 3d modeling and simulation cloth software. You have just to download the trial version to cleary understand how easy is this software to make you "the master of the clothes". This maya tutorial is a simple guide that will make you enjoy the magic world of cloth simulation. Let's do something!
CREATING MATTRESS
STEP 1: CREATE THE MATTRESS BASE MESH
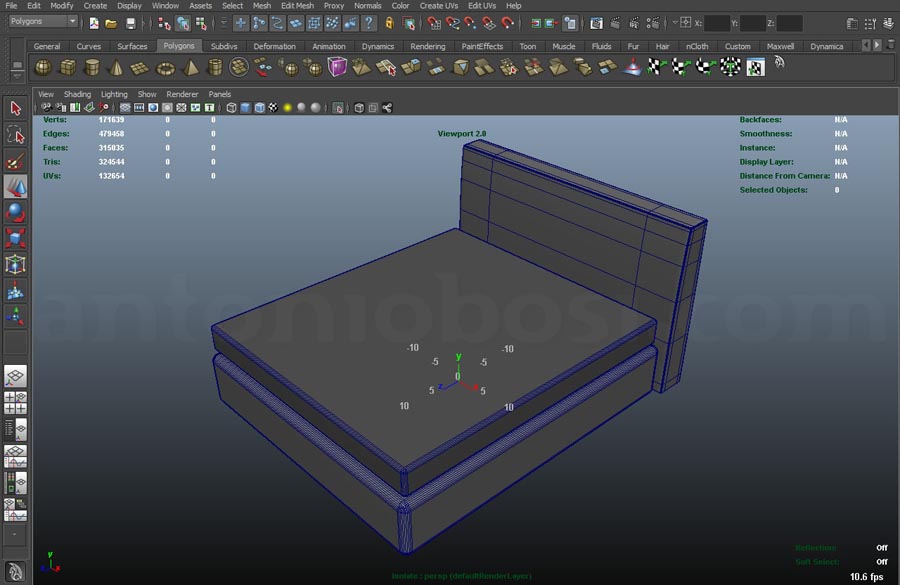
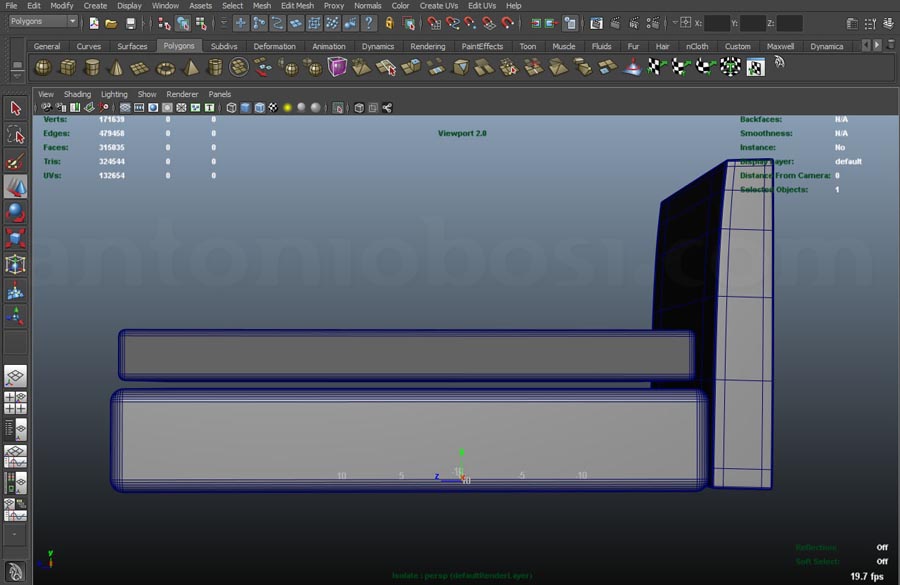
We have to create the main volumes of the bed. So let's create a poly box primitive to make the mattress (my measures 39x42x4) and use some fantasy to make the other elements of the bed. Apply just a little bit of bevel. Move all the created meshes some centimeters over the 0 Y point of maya. Be sure to stay above the 0 y point or the simulation may be encounter some problems. Stay centered to the world origin. Be sure to maintain a little gap from the mattress and the bottom part of the bed.
STEP 2: EXPORT MATTRESS MESH FROM MAYA, IMPORT GEOMETRY INTO MD
From Maya select the mattress mesh and go to menu--->file---> export selection. Choose .obj from the format type menu, get a name like "mattress" and save.
After that open Marvelous Designer and create a new scene, then IMPORT OBJ file and use a scale of 10.000
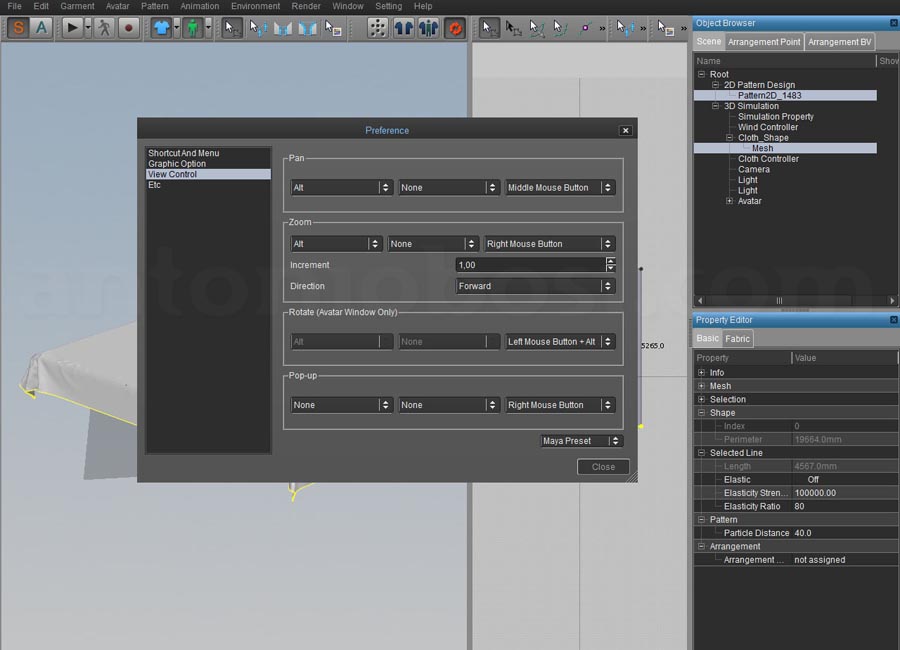
At this point I advice you to set the maya preset for an easy navigation: go to SETTING-->PREFERENCE-->VIEW CONTROL-->MAYA PRESET. This will make your life inside Marvelous Designer familiar (even if the zoom control is inverted compared to maya).
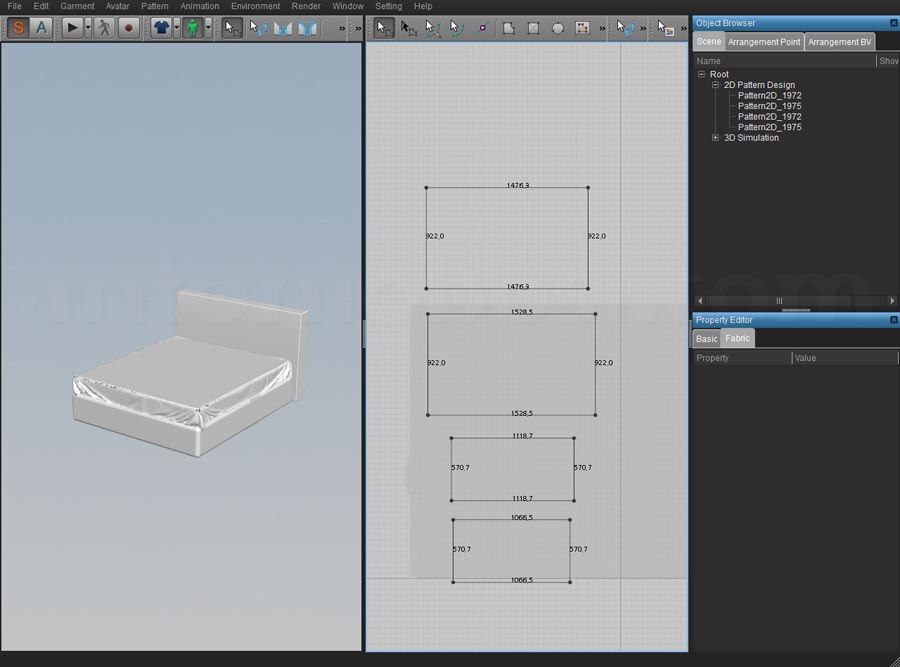
STEP 3: DESIGN YOUR FIRST TISSUE, CREATE MATTRESS SHEET
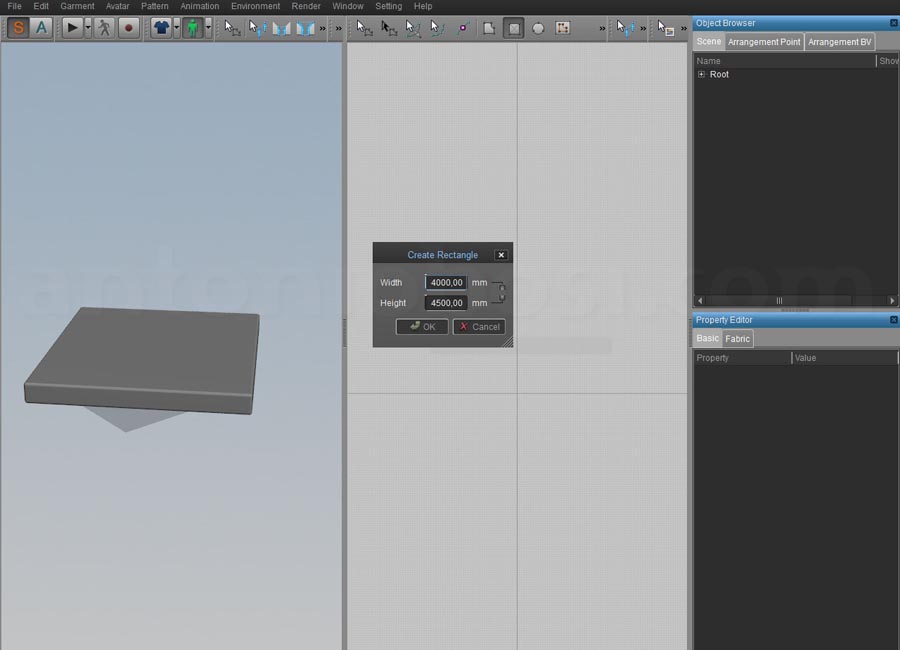
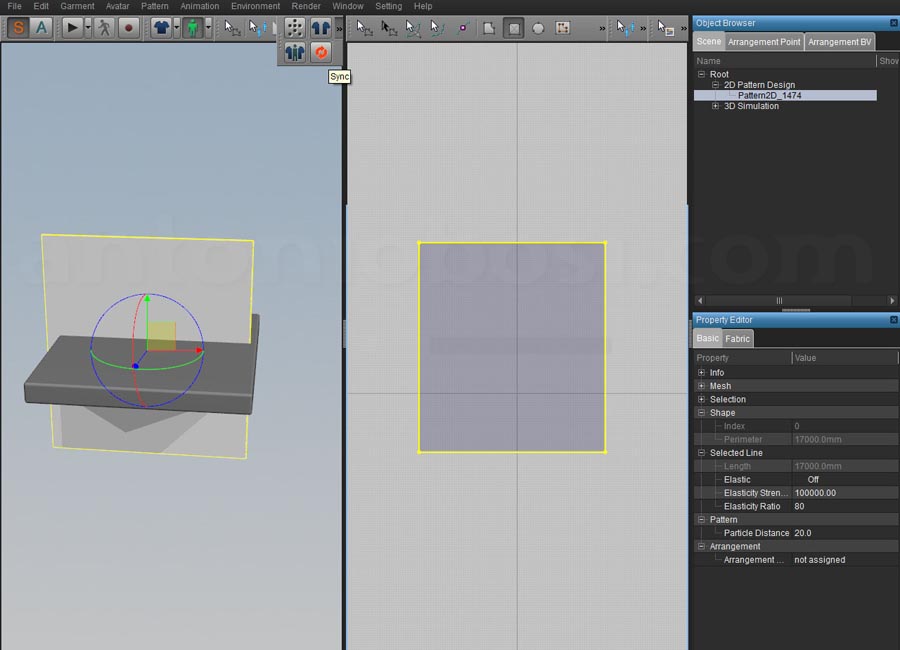
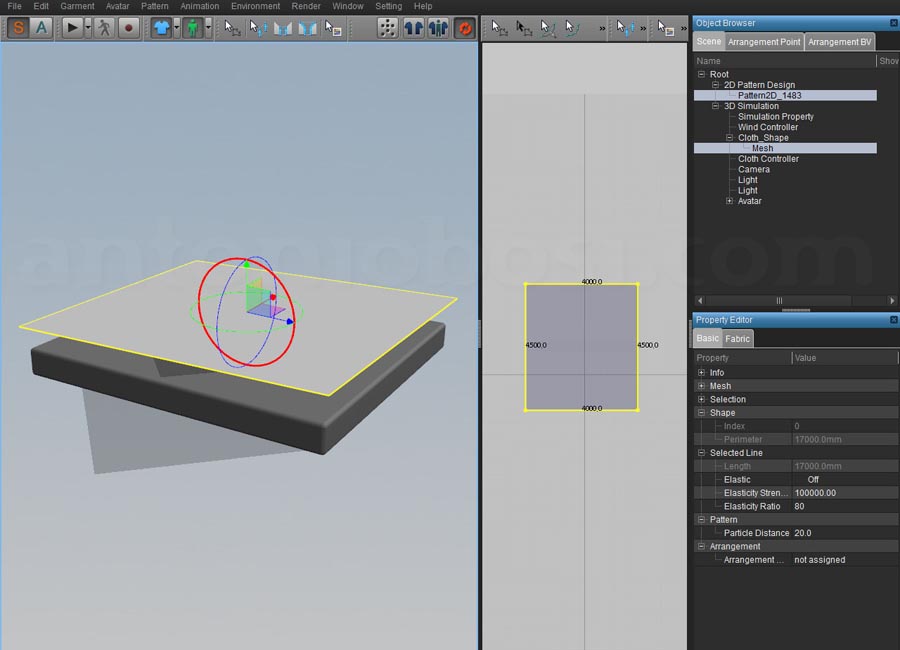
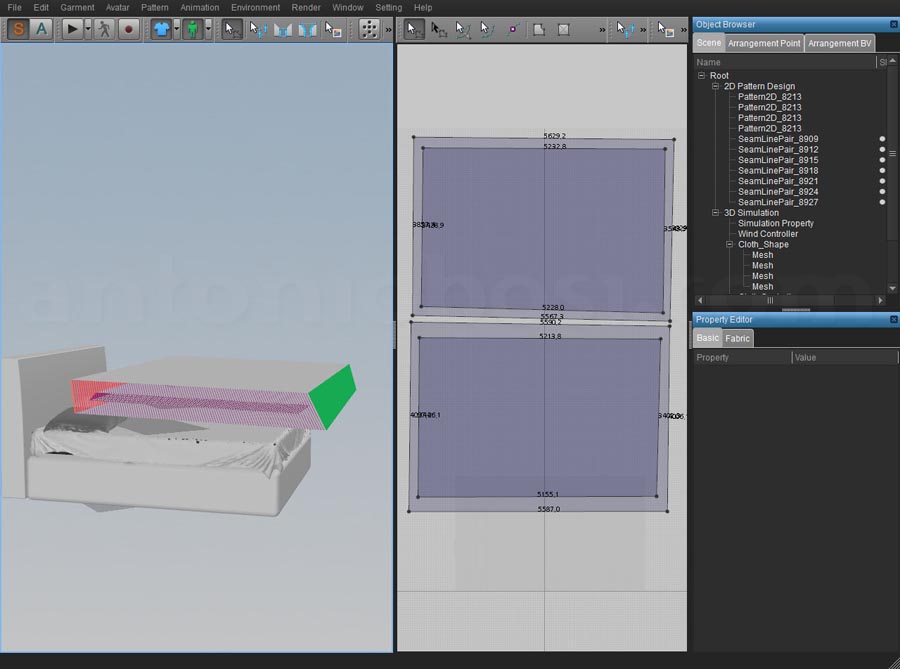
Now to create the bed sheet pattern, select the rectangle tool then Left mouse button click in the 2d view and enter the dimensions of the bed sheet (I’ve put 4000x4500). Click the sync button to see sheet appear on the left, you have to rotate it trying to match the top of the mattress. Just select the shape and rotate/move as shown in the image below (I advise you to set your GIZMO to work in local coordinates: ENVIRONMENT---->GIZMO).
STEP 4: ADJUSTING SIZE
Adjust the size if needed by selecting the edge and drag while holding down "shift"
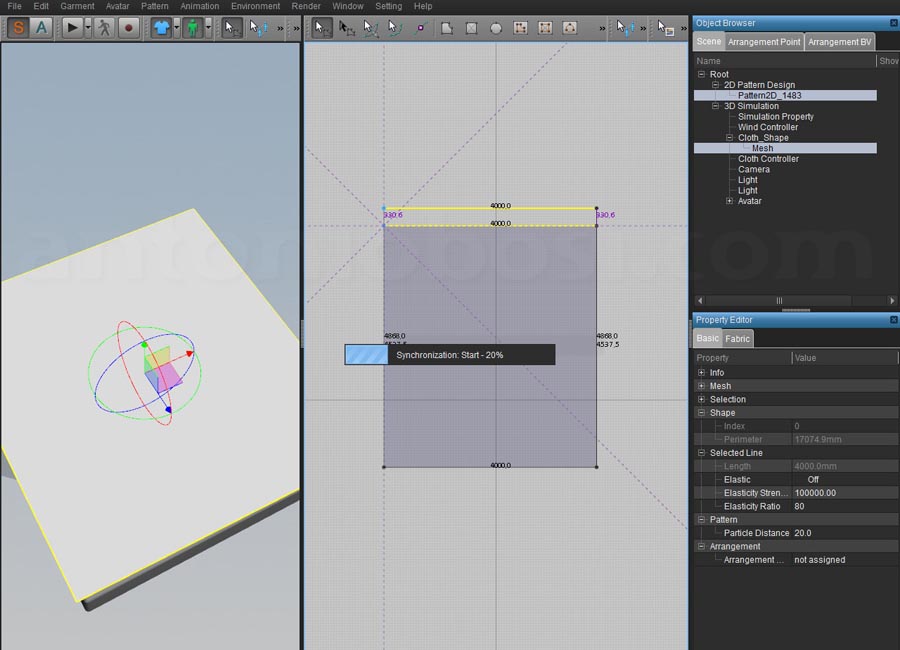
STEP 5: SETTING CORRECT PHYSICAL PROPERTIES
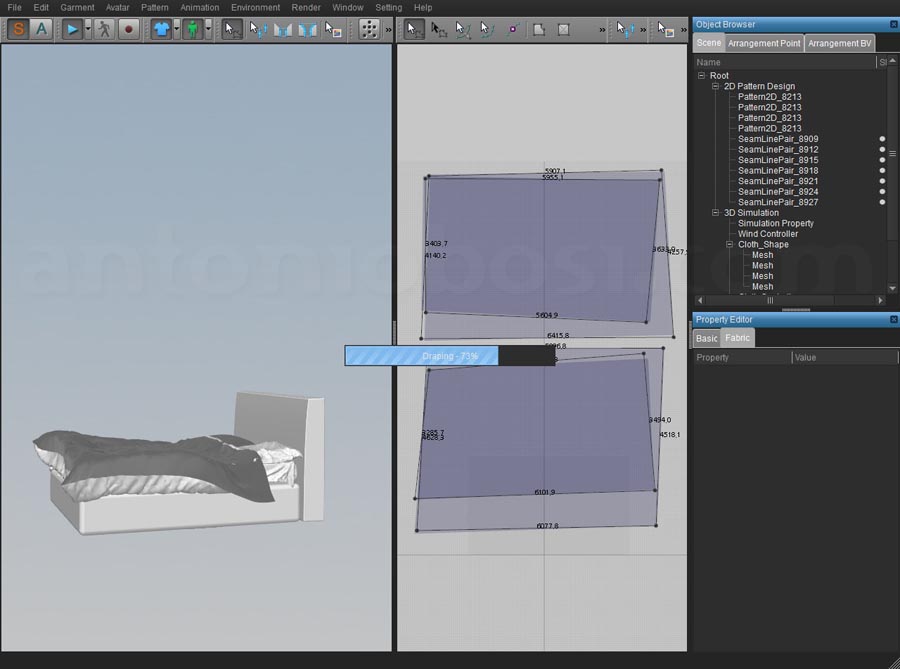
Now set the right physical properties for the simulation. First select the shape, then lower the mesh density by setting "Particle Distance: 40" and choose the “Cotton_CLO” preset from FABRIC tab (on the bottom-right). Now press play and watch the magic begin! Pause the simulation when it seems ok (it's a very slow process because it's heavy and.... single treaded ?!?!!!!).
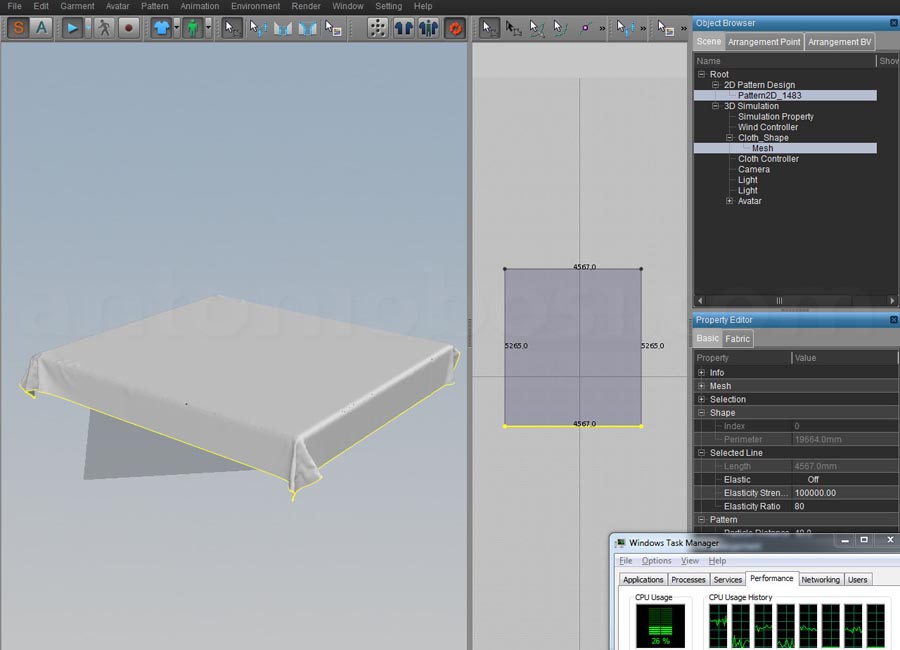
STEP 6: wrap the mattress sheet around the mattress base mesh using elastic properties
Select all the external edges and enable "elasticity" option under BASIC propreties tab on the right. Set the elasticity parameter to 20 and press play again. You'll see the sheet wrap around your mattress. Pump up the resolution: PARTICLE DISTANCE 20 or 10 (this will take a lot longer so you need to simulate for a couple of minutes or the result wouldn’t look so great). When you are satisfied export all to Maya using scale 1% and OBJ format.

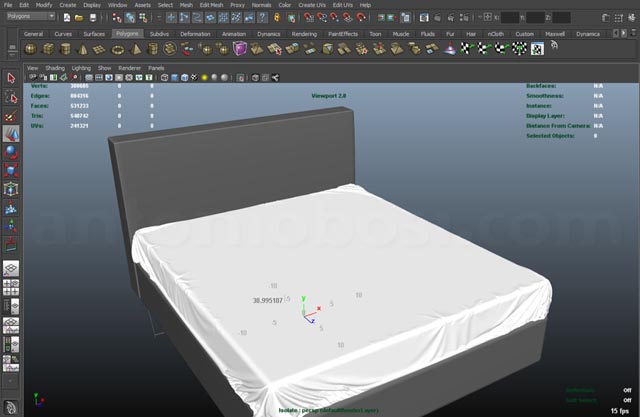
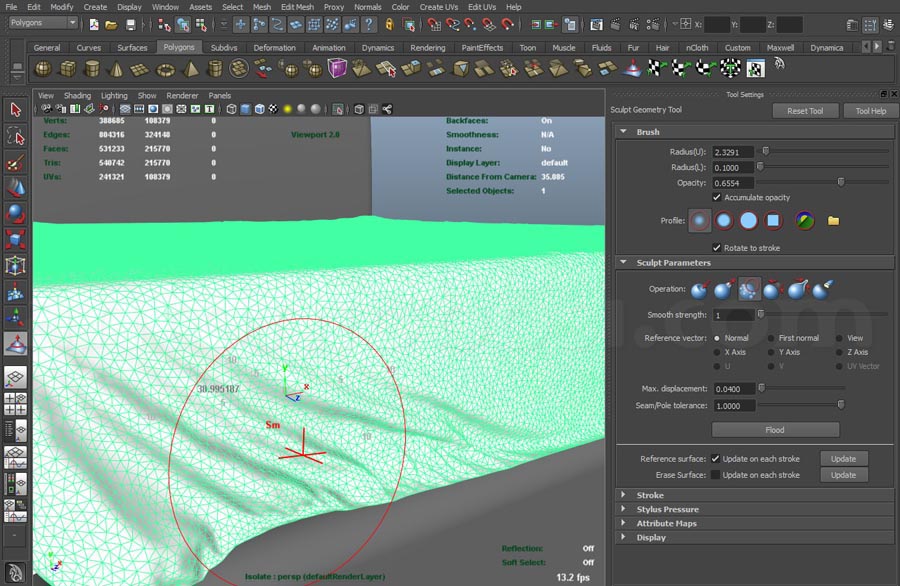
STEP 7: IMPORT IN MAYA AND SMOOTH THE MESH
Once you have imported the OBJ file inside maya you would like to use artisan tool to smooth/relax the generated geometry and obtain a less hard geometry
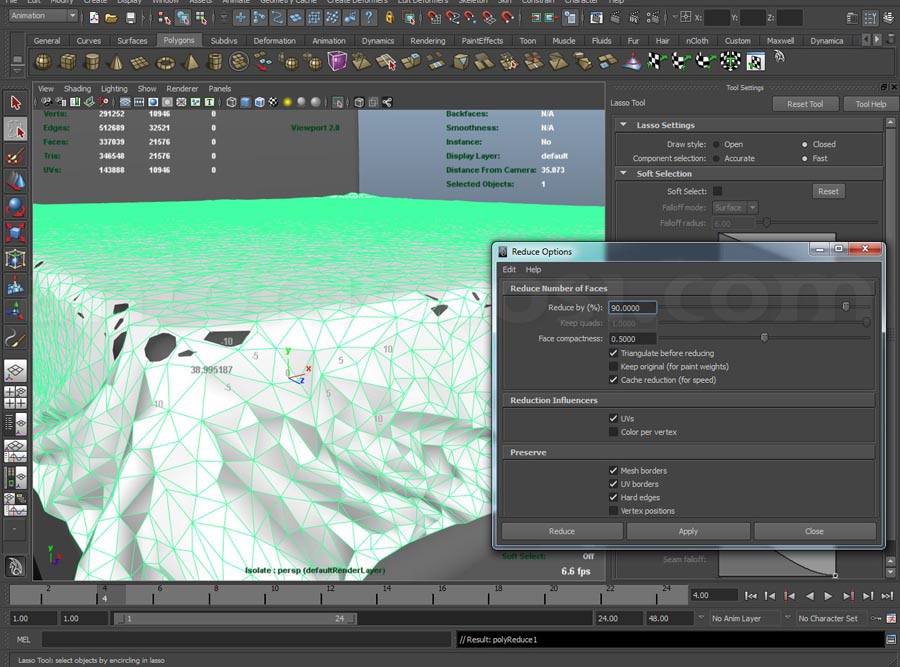
STEP 8: CREATE A LOWER POLY MESH
Now you need to create a low poly mesh to use it for further simulations inside Marvelous Designer. To make so select the sheet and aplly POLY REDUCE (under Mesh poly tab), set it around 90%. Once accomplish that task export everything to marvelous designer (the whole bed).
CREATING PILLOWS
STEP 1: CREATE THE PILLOW SHAPE
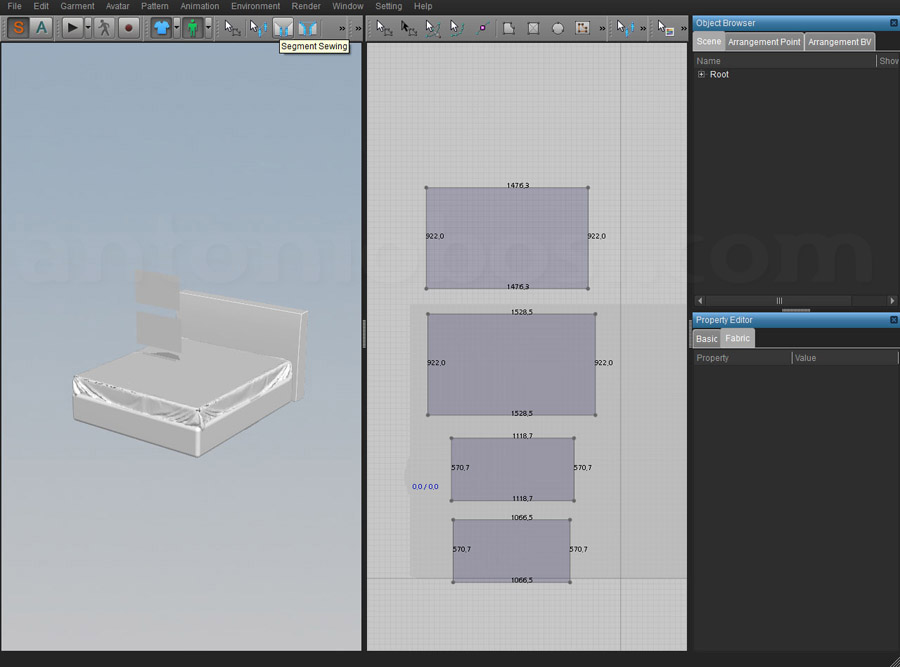
Create the pillow shape using the rectangle draw tool as shown in the image below. You should obtain 2 pairs of shapes: 1 bigger (that will be the external part of the pillow) and 1 smalle (it will be the inner part of the pillow).<
Assign correct phyisical properties to the new shapes:
BIG SHAPES: COTTON PRESET ;
SMALL SHAPES: Stretch - Weft: 99, Stretch - Warp:99, Bending - Weft: 99, Bending – Warp: 99 – Density: 23 – Density: 0
STEP 2: CONNECT SHAPES TOGHETER
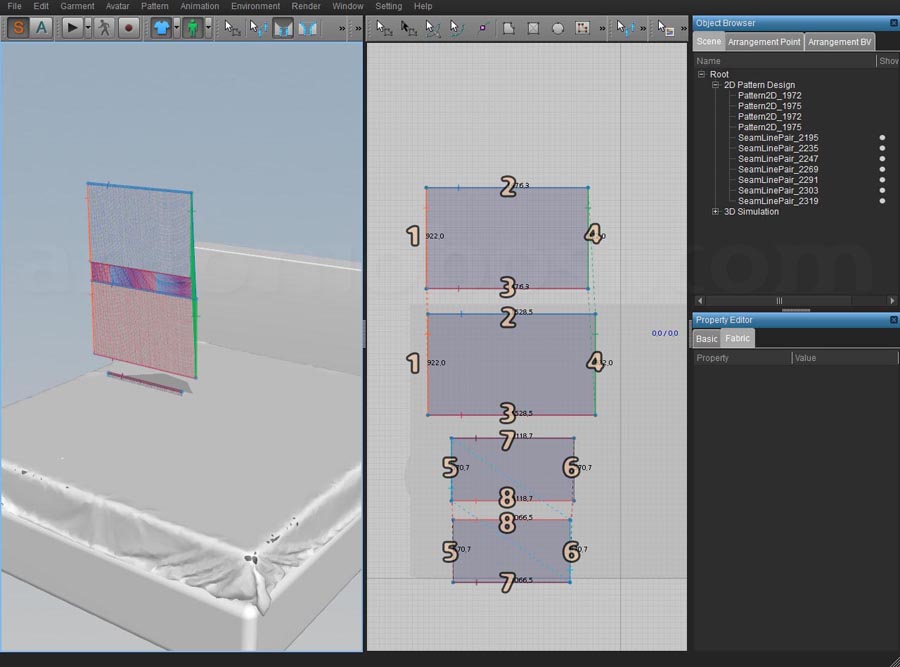
Use SEGMENT SEWING TOOL to connect all the edges. Use the order shown in the figure. Be sure that the sewing lines are appearing in the same way show in figure 2 (traight with no X paths), otherwhise click with the RMB on the edge and choose FLIP HORIZZONTALY, this will fix your sews.
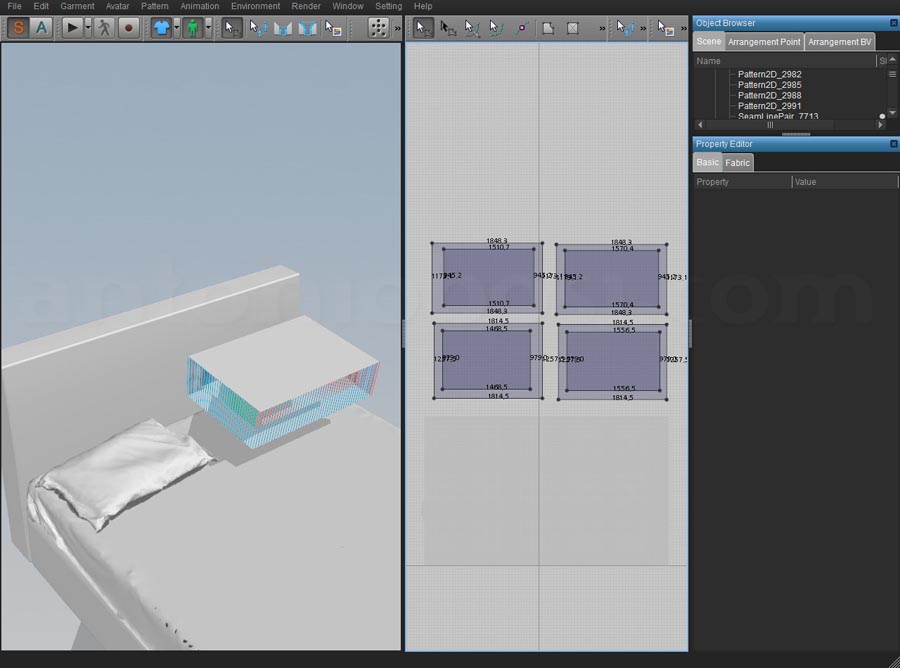
STEP 3: POSITION PILLOW SHAPES
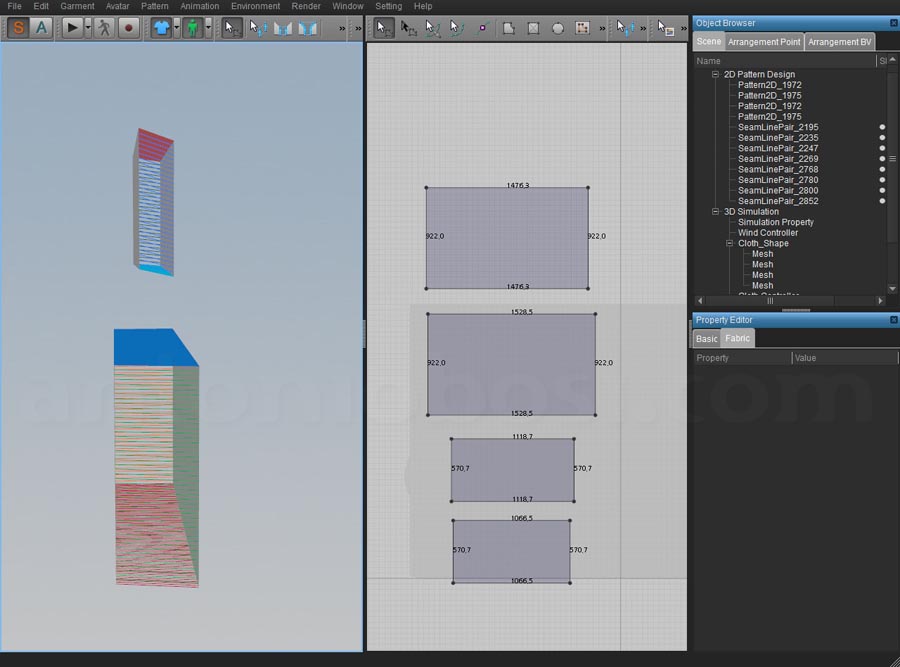
Rotate and position them like the image below (the smallest shapes inside the big one) and place them above the bed
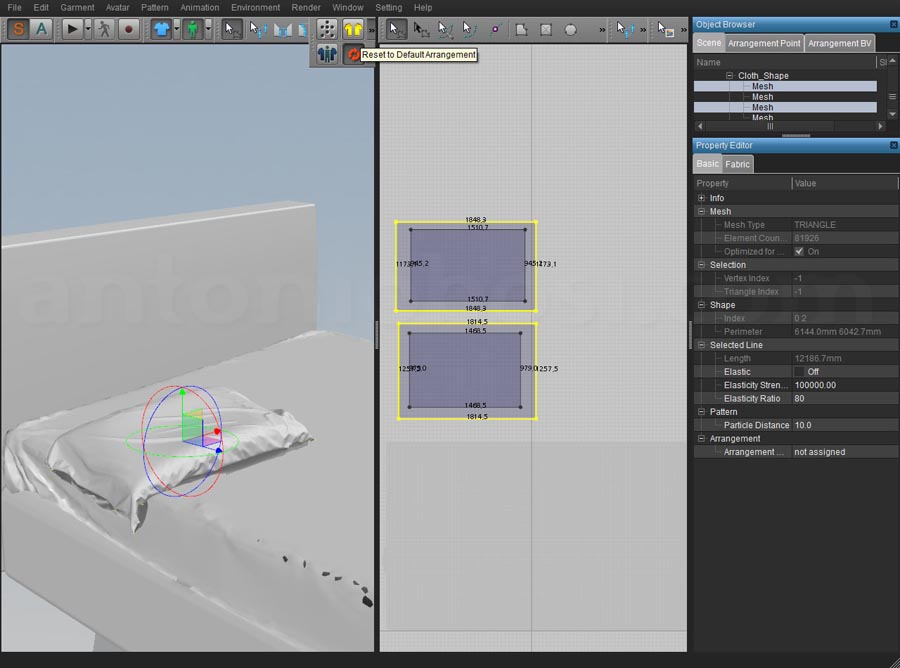
STEP 4: SIMULATING PILLOWS
Press simulate and wait for the simulation to settle down. You can move the pillow while simulatin by draging it with the left mouse button. If something went wrong use "Reset to default arrangements" icon, it will set your pillow in the last position.

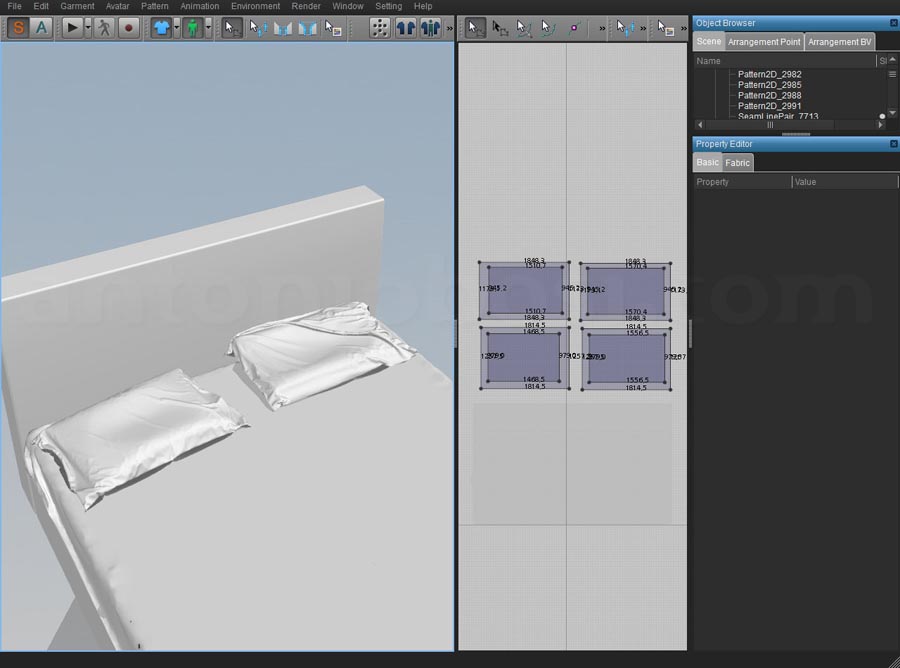
STEP 5: FINAL TOUCHES AND EXPORT
Select all seam lines in the object browser and set the fold angle to 240 (this will create a visible seam around the pillows). Press simulate (this will take several minutes) when the simulation have settle down stop it. Increase the resolution for final simulation (PARTICLE DISTANCE 20 or 10)
STEP 6: CREATE LOW POLY PILLOWS
Select and export pillows to Maya (scale 1%), then make the exact steps you made for the mattress cover (adjust the model with SCULPT GEOMETRY TOOL, MAKE A LOW POLY VERSION OF THE PILLOWS) export again to OBJ.
CREATING BLANKET
STEP 1: CREATE BLANKET'S SHAPES THEN SEW AND POSITION THEM
In Marvelous Designer IMPORT and select the mesh you just exported (low-poly mattress cover + pillows). That will be the base for your blanket.
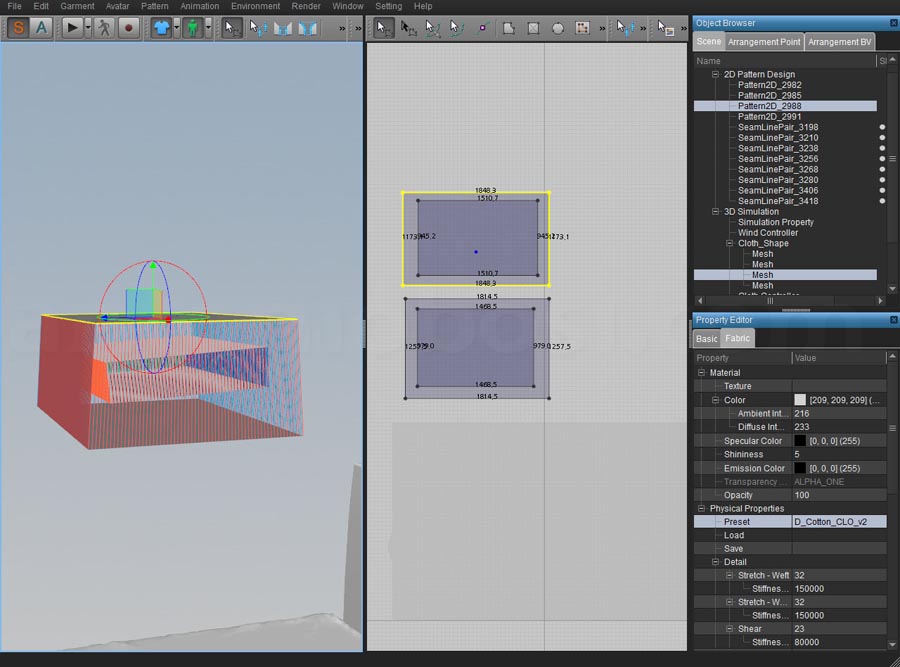
Create the patterns for the blanket, change the particle distance to 40 for faster simulation. Then set physical properties like the ones we used for the pillows. The blanket will be made in the same way as the pillows, using an inner layer for filling. So create, sew and position the blanket's shapes like the image below.
STEP 2: SIMULATING BED'S BLANKET
Start simulate, that will be very slow. You can move the bed cover while simulating. If you feel that the bed cover doesn't behave or look the way you want then you can tweek the Physical Properties of the inner/filling patterns (try Bending: 60), when you are happy with the result pause the simulation.
STEP 3: FINAL TOUCHES
Select all patterns and change the Particle Distance to 20 or less and press simulate then let it simulate a while.
If you want achive a more interesting look you should drag the bed blanket while simulating (note this will be very slow so don't move the mouse too fast).
When you are happy with the result stop the simulation.
Now select all seam lines in the object and set the fold Angle to 240 and then press simulate (let it simulate several minutes).
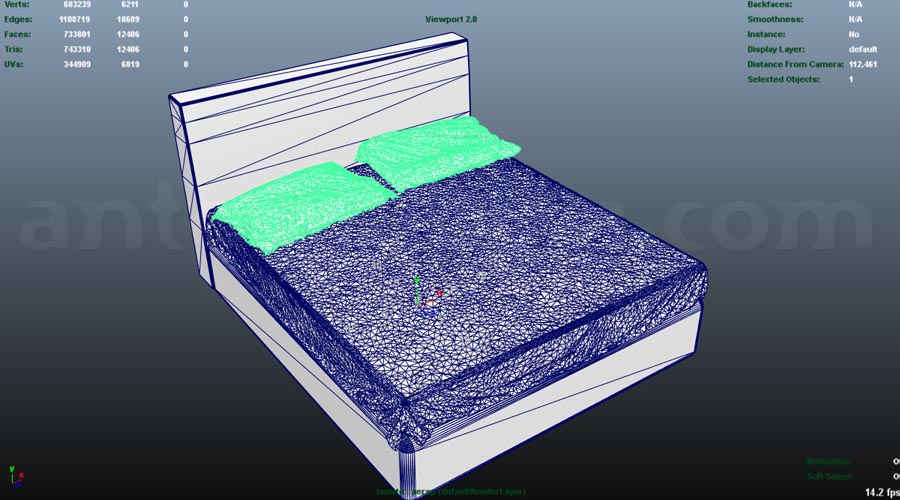
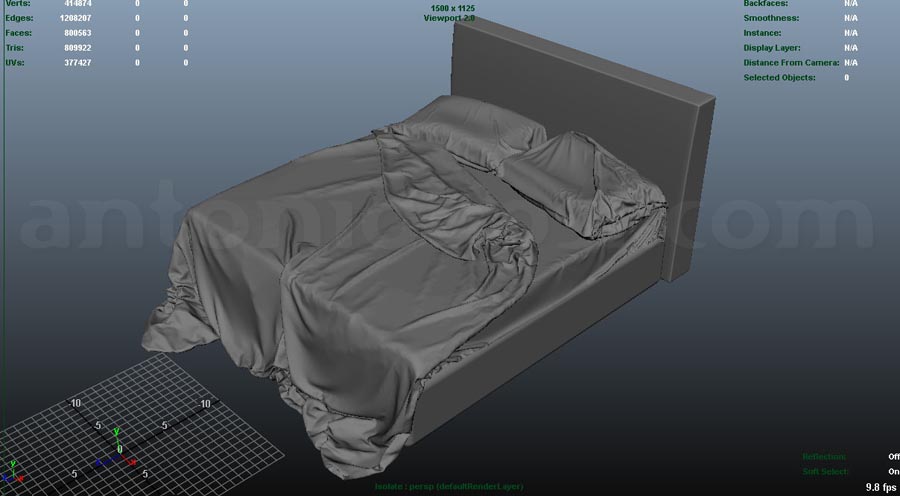
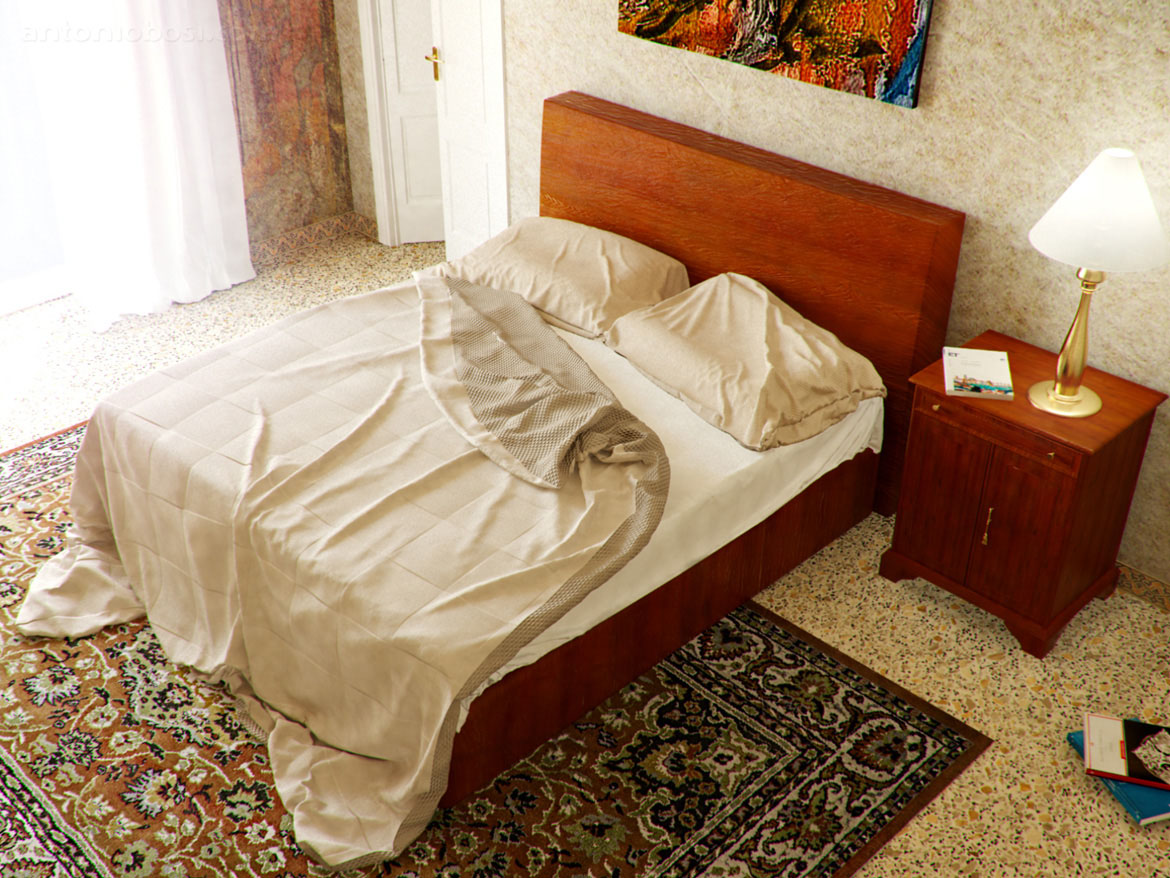
EXPORT ALL in Maya and enable the HIGH-POLY versions of the bed's pieces. Now adjust using rotate and scale tools, then artisan to smooth and model s you like. Here's my final model
TEXTURING
STEP 1: SETTING MATERIALS
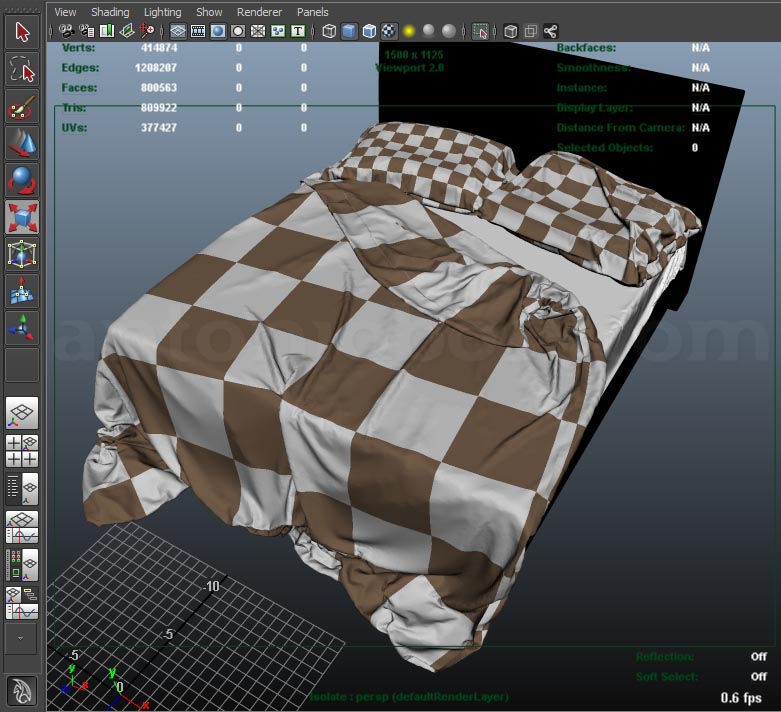
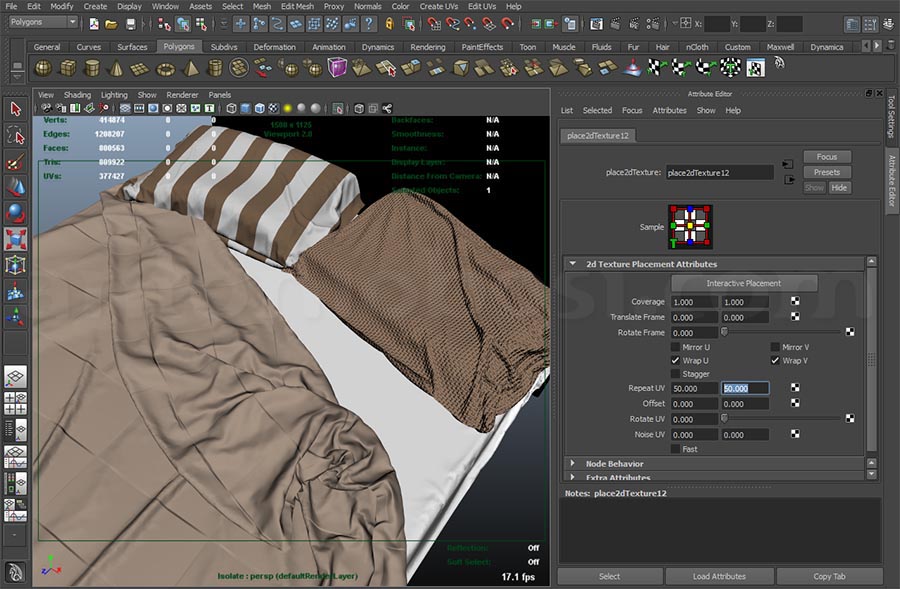
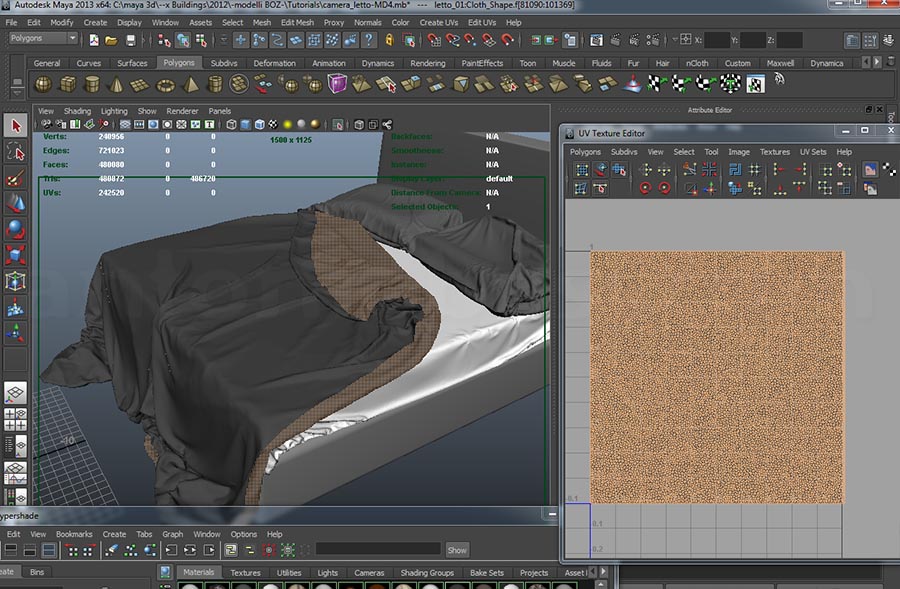
Just assign a material (I advise to use mia_materials shaders) with a tileable texture, you will be pleased to see that the geometry is perfectly uv-mapped! Love those things.... just play with different textures/colors and texture repeat scale (you'll find that control at the end of the texture chain).
STEP 2: TEXTURING THE DOUBLE-FACE SURFACE
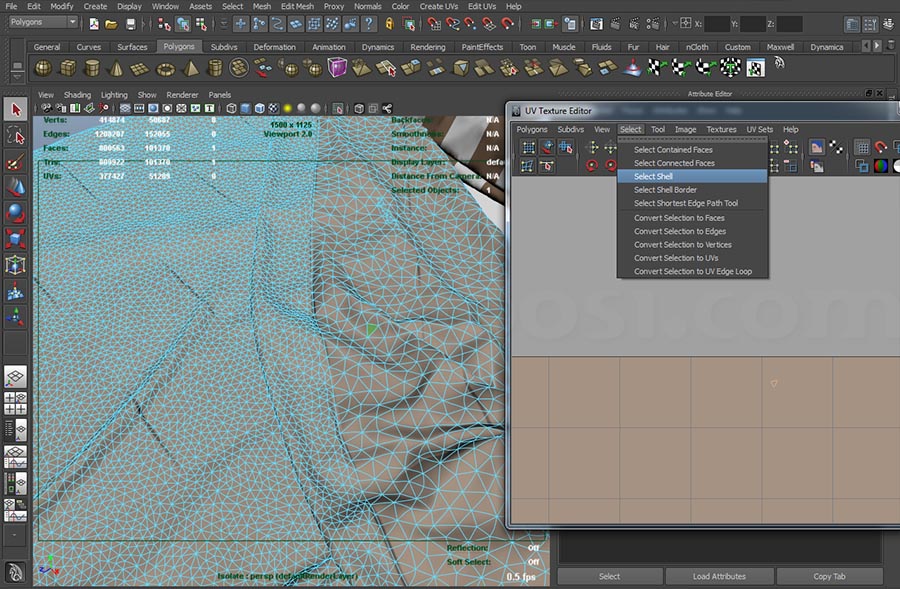
Here a little trick: you can assign different materials to different patch. Just select a single face of a patch of blanket, open uv-texture editor and go to SELECT ---SELECT SHELL. You've magically selected the entire patch! Now assign a different material to make it double face! Is it not great and easy?
FINAL WORDS
I hope you enjoyed this simple step-by-step maya tutorial. If something is not clear let me know.
Further I'll write a tutorial part II where we'll discuss about lightning, rendering and deep texturing tecniques.


19 thoughts on “Create Realistic Bed in Maya (Free Maya tutorial)”
Realistic bed modeling is art but its not hard. You provide good tips to creates realistic bed modelingi
Hello! I just love the way you explain and show us how to keep learning from every tutorial. Since few years ago, I’ve been trying to lear how to properly light up and render in maya with mental ray. I just saw this tutorial (“How to model a realistic bed in Maya and Marvelous Designer”) and the render is perfect. It would be amazing if you could show us how to render like this.
Many blesses.
:-*
Hello Antonio, when will you do your video tutorials???
Thanks for the Great tutorial!!… I’ve been looking around for tuts like this,…finally there’s a tut centered on maya and mental ray.. Continue the good work sir…
Amazing tutorial. The sheet simulation worked like a dream. However, I’m having some trouble with the pillows 😳 when I simulate them, they inflate and fly away instead on draping over the bed.
Any idea what could cause this?
Hi I am a student of architecture passer. you’re an expert in graphic design question I wanted to know if I want to have a good rendering of what software I use
Any chance of this tutorial being updated slightly for MD3?
The interface is different and it’s difficult to follow this tutorial :/
Hi Andrew, not sure to put my hands on that in the short time…….I could convert the tutorial for MD4 (because it’s the latest release), but I can’t say exactly when ! 😕
I’m trying it.. but I can’t continue from step 1 to step 2.. there is no .obj in the save selection.. may I know what maya version do u use?
kay, take a look at this video
https://m.youtube.com/watch?v=bKBZJCfRkUs
Thank you very much! 😀
Waiting for part II.
is there a link for the lighting and rendering section for the tutorial? This is an EXCELLENT tutorial man. Really great work! I’d like to see it in full completion and just need to find where the rendering part is. Bravo sir! Bravo
Hi Swiss, thx for your comment. I hope to make the lighting and rendering tutorial soon….I just have to find some free time!!! I’ll post updates here, hope soon!
Thank you for share this!
you are my hero 😀
please help, can’t watch to pictures 😥
Sorry mate, I’m upgrading the site code on these days..I’ll fix my tutorial’s bugs soon!! 😉
Thank you for your comment!
I really expect to this tutorial 😀